Designing efficient drip irrigation layouts for small plots
A compact, well-planned drip irrigation layout can make a small plot more productive while saving water. This teaser highlights essential steps for mapping zones, choosing emitter flow, and combining practices like compost, mulching, pruning, and rainwater capture. Attention to raised beds, vertical arrangements, and plant grouping helps ensure water goes where roots need it most.

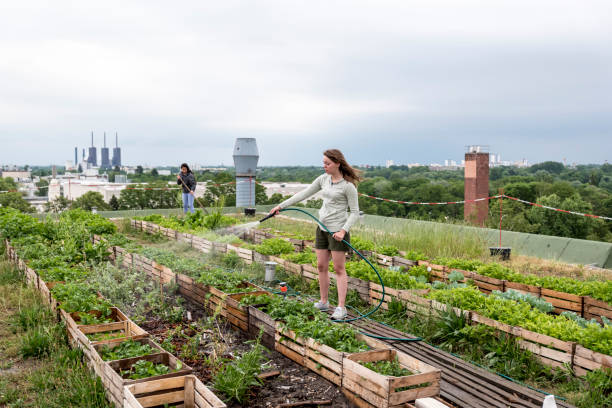
A thoughtful drip irrigation layout begins with a map of the plot: mark dimensions, existing structures, plant groups, and water sources. Group plants by water need — for example, thirsty vegetables separately from drought-tolerant natives — so each zone receives the right volume. Note soil texture and slope to guide emitter spacing and run lengths. Integrate soil-building practices such as compost and mulching, and plan for maintenance access so pruning, propagation and pest control tasks do not disturb tubing. Consider how raised beds and vertical installations will affect tubing runs and rooting volume.
irrigation: how do I size lines and emitters?
Sizing starts from emitter flow and total emitters per zone. Common emitter rates for home gardens range from 1 to 4 liters per hour. For microtubing runs keep lengths modest to avoid pressure loss; for main lines choose 16 mm (1/2 inch) or larger where many emitters are connected. Calculate total demand (emitters × flow) and ensure the tap or pump and pressure regulator can supply it. Use pressure-compensating emitters when elevation varies, and place emitters closer together for containers or propagation trays to ensure even wetting.
soil health: how does soil type affect layout?
Soil texture shapes how water spreads from each emitter. Sandy soils have narrow wetting zones and need closer emitter spacing or higher frequency, lower-volume cycles. Clay soils spread water wider, so emitters can be spaced farther apart but irrigation must be less frequent to avoid waterlogging. Adding compost improves structure and moisture retention in both soil types. Test infiltration before finalizing run times and adjust cycles based on season, plant growth stage, and recent pruning or mulching that alters plant water use.
mulching: how does mulching influence spacing and timing?
Mulch reduces evaporation and stabilizes soil temperature, often enabling reduced run times or lower emitter densities. Organic mulches like straw, wood chips or leaf litter also feed soil organisms as they break down, improving soil health and helping retain moisture so drip systems work more efficiently. When laying tubing, keep emitters accessible: mulch around but not completely over emitters to simplify maintenance. Mulching can also reduce pest pressure by keeping surface moisture moderated, which supports integrated pest control strategies.
rainwater: how to integrate harvested rainwater?
Rainwater harvesting can supply a drip system, but filtration and pressure management are essential. Install a screened inlet, first-flush diverter and a sediment filter before the supply line; small tanks often need a pump and pressure regulator to ensure consistent emitter performance. For many small plots a 500–2000 liter cistern provides useful buffering for frequent short cycles. Monitor stored water for debris and algae, and clean filters regularly to prevent emitter clogging. Combining harvested rainwater with compost and mulching lowers overall water demand.
raised beds: how do layouts differ for raised beds and containers?
Raised beds and containers have limited rooting volume, so they benefit from denser, more targeted emitter placement. Inline emitters every 20–30 cm along a lateral line usually give even coverage in vegetable beds; containers may need individual microtubing to each pot. Use manifolds and sector valves to isolate beds for different crops or propagation stages. Raised beds with good compost content retain moisture better, allowing slightly lower emitter flows, while regular pruning and careful propagation reduce sudden spikes in water demand.
vertical: how can drip systems serve vertical gardens and trellises?
Vertical systems use lightweight microtubing and low-profile emitters that attach to frames or pockets. Run supply lines up the structure and place emitters near the root zones of each pocket or container; gravity helps distribute water downward but test to ensure bottom pockets receive enough flow. Group plants by water need so trailing vines or edibles do not compete with drought-tolerant natives. Secure tubing against UV exposure and inspect connectors; vertical installations can be scaled by adding additional pressure-balanced lines as needed.
Conclusion
An efficient drip layout for a small plot balances hydraulics with plant needs and soil conditions. Zone by water requirement, match emitter spacing to soil texture and rooting volume, and conserve moisture with compost and mulching. Integrate rainwater carefully and adapt tubing for raised beds, containers, and vertical structures. Regular maintenance — cleaning filters, checking emitters, and adjusting for pruning or seasonal changes — keeps the system delivering water where it is most effective.


